
In this following monster illustrator tutorial, you will learn how to create a cute quadruped monster character design. This is a beginner’s illustrator tutorial. You need to have Illustrator CS4, CS5, CS6, or Illustrator CC in order to follow along. You need to have the basic knowledge of Adobe Illustrator and be able to work with tools such as Pen Tool, and Gradient Tool. You will also need to have basic drawing and sketching skills to complete the monster illustrator tutorial.
Sketch Drawings – Quadruped Monster Illustrator Tutorial
First, make a couple of sketches even if you are terrible at drawing. Don’t spend too much time on the pictures and don’t detail them. Every monster character design sketch needs to be created in less than a minute. Always create different characters. For example: if your first sketch is with a big head and tiny tentacles, the next design should be the opposite ( small head with long tentacles ). Tend to have more than 10 character designs. The more characters, the bigger the diversity is. Tend not to spend more than an hour on your sketches.
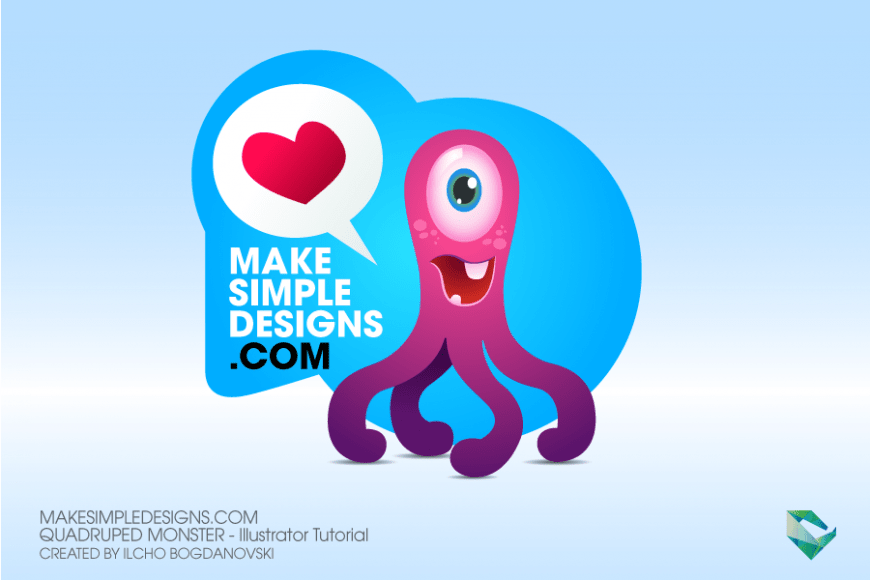
This is the result I have chosen for the cute Quadruped Monster Illustrator Tutorial.

Background Outlines – Quadruped Monster Illustrator Tutorial
STEP 1- Create 2 circles as shown in the image below. Pick the P key on your keyboard to activate the Pen Tool. Draw a rounded triangle sort of shape as is shown in the image below. Go to Window -> Pathfinder and make sure that Pathfinder is selected. Press the V key on your keyboard to activate the Move Tool. Select the 3 shapes and press the “Unite” button from the Pathfinder menu ( see image below). The shape is now ready for a gradient. This complete’s the background outlines section off the cute quadruped monster illustrator tutorial.

Add Gradient to Background Shape
STEP 2 – Select the background shape you have created. The size of the background shape should be – Width 645 and Height 410. Press the G key on your keyboard to activate the Gradient Tool. The Gradient needs to be Radial. Apply a gradient to the background shape. Set the inner color to be 2ae2ff and Location 0%. Set the outer color to be 00adff and Location 100%. The position of the gradient is shown in the image below. This complete’s the gradient section of the cute quadruped monster illustrator tutorial.

Quadruped Shapes – Quadruped Monster Illustrator Tutorial
STEP 3 – Select the Pen Tool and start outlining the drawing you have. We have created 2 shapes for the Quadruped character. Shape 1 is the head and 3 tentacles. Shape 2 is the fourth tentacle and it’s going to be behind Shape 1. The shape of the quadruped is going to be Width 275 and Height 360.

Quadruped Gradient – Quadruped Monster Illustrator Tutorial
STEP 4 -Press the G key on your keyboard to activate the Gradient Tool. Select Shape 1 and add a gradient. Gradient needs to be Radial. Set the inner color to #f94690 and Location 12%. Set the outer color to be 00adff and Location 100%. The position of the gradient for Shape 1 is shown in the image below.
Press the G key on your keyboard to activate the Gradient Tool. Select Shape 2 and add a gradient. Gradient needs to be Radial. Set the inner color to be 300038 and Location 0%. Set the outer color to be 5c156b and Location 100%. The position of the gradient for Shape 2 is shown in the image below.

Speech Bubble and Hearth – Monster Illustrator Tutorial
STEP 5 – Create an ellipse and a triangle as shown in the image below. Now repeat STEP 1. Simply select Shape 1 and Shape 2 and press UNITE to merge the 2 shapes. You have created the Speech Bubble shape. The size of the Speech Bubble Should be – Width 175px and Height 190px. Then press the P key on your keyboard to activate the Pen Tool. Outline the heart and you are done. The size of the Heart Should be – Width 107px and Height 85px. Now you have the speech bubble and the heart outlined. In the next step, we are going to color them.

Bubble and Heart Gradient – Monster Illustrator Tutorial
STEP 6 – You need to apply a gradient to the Hearth shape and the Bubble Speech shape.
Press the G key on your keyboard to activate the Gradient Tool. Select Bubble Speech shape and add a gradient. Gradient needs to be Linear. Set the inner color to be #ffffff and Location 0%. Set the outer color to be cfe2df and Location 100%. The position of the gradient for the Bubble Speech shape is shown in the image below.
Press the G key on your keyboard to activate the Gradient Tool. Select Hearth shape and add a gradient. Gradient needs to be Linear. Set the inner color to be ff0b51 and Location 12%. Set the outer color to be 8d0022 and Location 100%. The position of the gradient for the Hearth shape is shown in the image below.
In the next step, we are going to learn how to add shadows where the tentacles meet the ground.

Tentacles ground shadow – Monster Illustrator Tutorial
STEP 7 – Create an ellipse – width around 100px and height around 15px. The ellipse will be the shadow under the tentacles. Add a radial gradient to the ellipse. Make sure to squash the gradient so it will have the same form as the ellipse. Color 1 will be Black (000000), Location 0%, Opacity 100. Color 2 will be also Black (000000), Location 85%,Opacity 0%. Duplicate the ellipse 4 times and place each ellipse under each tentacle. The result can be seen in the image below.

The EYE – Monster Illustrator Tutorial
STEP 8 – Create 3 ellipses.Base eye ellipse – width 78px and height 100px.Iris ellipse – width 36px and height 45px.Pupil ellipse – width 22px and height 28px. Position them as it is shown in the image below.

Eye Gradients – Monster Illustrator Tutorial
STEP 9 – Add Radial Gradients to the Base Eye shape and Iris shape. The Pupil will have a solid color.
Base Eye Gradient – Color 1 will be white (#ffffff), Opacity 0%, Location 50%, and Color 2 will be Pink ( ff6abd ), Opacity 60%, Location 100%.
Iris Gradient – Color 1 will be Green (8ab232), Opacity 100%, Location 47% and Color 2 will be Blue ( 1b8fef ), Opacity 100%, Location 88%, Opacity 100%.
Pupil – Set color to Dark Grey ( 2a3033 ).

Eye reflections – Quadruped Monster Character design
STEP 10 – Create 3 shapes for the reflections of the eye. The shapes are shown in the image below. The 1st highlight dot will be positioned at the top right border where the Pupil meets the Iris. The 2nd highlight dot will be positioned at the bottom left border where the Pupil meets the Iris. See the image below.
Create a curved shape as it is shown in the image below. Set the gradient to be – Color 1 will be white (#ffffff), Opacity 100%, Location 0%, and Color 2 will be white (#ffffff) again, Opacity 0%, Location 100%.

Details under the eyes – Quadruped Monster Character design
STEP 11 – Create a couple of ellipses of different sizes. They shouldn’t be bigger than 15 x 15 or smaller than 3 by 3 pixels. Create around 10 ellipses. Give them all the same color ( fc6bad ). Position them right under the eyes on both sides.

Mouth – Monster Illustrator Tutorial
STEP 12 – Draw a shape as shown in the image below. Then add a gradient to it. Set the gradient to be – Color 1 will be Dark Red (630020), Opacity 100%, Location 0% and Color 2 will be Red/Orange ( df3122 ) again, Opacity 100%, Location 100%.

Lips – Monster Illustrator Tutorial
STEP 13 – Pick the P key on your keyboard to activate the Pen tool. Draw 2 lips on top of the edges of the mouth. The Top Lip will have a Dark Purple color ( 7d2589 ). The Bottom Lip is light. Simple make tiny outlines. We don’t use Strokes because they will make bold the joints where the 2 lips meet. Using the Pen tool gives us control over the thickness of lips and that’s what we want.

Teeth – Monster Illustrator Tutorial
STEP 14 – Create 2 shapes for the teeth of the monster. One tooth (the bigger tooth) needs to be on top and the other on the bottom ( the smaller tooth ) of the mouth. The gradient for the teeth will be the same. Set the gradient to be – Color 1 will be Pink (f7b0e5) , Opacity 100%, Location 0% and Color 2 will be White ( #ffffff ) , Opacity 100%, Location 100%. The gradients ( color 1) will start from the base of every tooth.

This is the result that you get after completing STEP 14. I hope that this tutorial will inspire you to create other monster characters. If you liked the tutorial share the link on Twitter, Facebook, Google+, Pinterest, and other social networks.
Leave a Reply